Firebase is meant to be easy, and was created for the client environment before Edge Functions or non NodeJS environments became the norm. This app will show you how to combine the Client and the Server environments for a faster Todo App.
TL;DR #
Using Firebase on the server does not require firebase-admin unless you need authentication. Usually it is easier to just load your authenticated data on the client, as that won’t effect SEO anyway. However, if speed is important to you even when fetching authenticated data, and you want the user experience to be upgrade a little, I suggest you look into this method. This can only work in serverless or pure NodeJS environments, but you could call the necessary authentication functions from an Edge Function to a Firebase Cloud Function or other NodeJS environment that support firebase-admin.
Firebase JS SDK #
Using Firebase with SvelteKit is pretty straight forward as long as you don’t call one of the authentication functions from the server. Those functions usually try and access window and document functions that will break your app. You can fetch your data just fine from the server otherwise, unless you have some Firebase Rules that require you to be logged in to view the data. In most scenarios, fetching the data that requires authentication from the client instead of the backend will be just fine. However, server fetching is really just faster in all scenarios, and better for SEO. Also you don’t need to view loading states, when the first state you would see would be the loaded data. Nevertheless, you may want all data, even authenticated data hidden behind Firestore Rules, loaded from the server first.
Firebase Admin and NodeJS #
When fetching Firebase data from the backend, you should really be using firebase-admin. This is designed for backend fetching, and can load your data quickly, without all the client caching and optimistic caches that are unneeded for one time fetches. Unfortunately there are a few gotchas.
1. Authentication does not work in any server environment #
This means you need to use Firebase Auth on the client, pass the token to the server, validate it, and create a sharable session cookie throughout your app. Firebase Authentication requires those document and window functions mentioned earlier. You have to be extra careful in what you’re querying, as firebase-admin will always have admin access to your app. If the token is not verified, you should not load your data.
2. Firebase Admin SDK does not work outside of NodeJS #
This is my biggest problem. Firebase Admin SDK will not work on Edge Functions. For most people this means they have to run their app on serverless or pure NodeJS environments. However, you could deploy your app to the edge, and create a callable Firebase Function or use a serverless function for the authenticated users where firebase-admin is supported.
3. You will fetch your data twice #
Firebase Firestore charges by reads. You don’t want to create an extra read when you don’t have to nor do you want to make an extra network call. If you get thousands of users, this adds up. Luckily, you can fetch the data on the server with firebase-admin, then load the data into the cache on the client with firebase to avoid refetching when you create a realtime connection. This is important because you always fetch the data once when you start a new realtime connection under the hood. You will always refetch the data when there is a change. Adding the data to the cache immediately avoids that first fetch and allows the app to use optimistic updates.
Firebase Setup #
This app is the server version of the SvelteKit Todo App, however you will notice it runs quicker. If please read that article first to make sense of the stores and other Firebase setup.
Firebase Client SDK #
Create a file called firebase.ts for you client setup.
	import { PUBLIC_FIREBASE_CONFIG } from '$env/static/public';
import { getApps, initializeApp } from 'firebase/app';
import { getAuth } from 'firebase/auth';
import { getFirestore } from 'firebase/firestore';

const firebase_config = JSON.parse(PUBLIC_FIREBASE_CONFIG);

// initialize firebase only once
if (!getApps().length) {
    initializeApp(firebase_config);
}

export const auth = getAuth();
export const db = getFirestore();
User #
The user setup is pretty much the same except you will load the initial store value from the user state from the server.
	const user = (defaultUser: UserType | null = null) =>
  readable<UserType | null>(
    defaultUser,
    (set: Subscriber<UserType | null>) => {
        return onIdTokenChanged(auth, (_user: User | null) => {
            // if no user on server, logout
            if (!defaultUser) {
                logout();
            }
            if (!_user) {
                set(null);
                return;
            }
            const { displayName, photoURL, uid, email } = _user;
            set({ displayName, photoURL, uid, email });
        });
    }
);

export const useUser = (defaultUser: UserType | null = null) =>
  useSharedStore('user', user, defaultUser);
Todos #
The todos setup is also identical. We are going to add more to it before they are loaded later.
	export const loadTodos = async (buffer: string) => {

    // load bundle buffer
    const loadedState = await loadBundle(db, buffer);

    if (loadedState.taskState === 'Error') {
        throw 'Error loading data from server';
    }
}

export const useTodos = (
    user: Readable<UserType | null>,
    todos: Todo[]
) => {

    // filtering todos depend on user
    return derived<Readable<UserType | null>, Todo[] | null>(
        user, ($user, set) => {
            if (!$user) {
                set(null);
                return;
            }

            // set default value from server
            set(todos);

            return onSnapshot(
                query(
                    collection(db, 'todos'),
                    where('uid', '==', $user.uid),
                    orderBy('createdAt')
                ), (q) => {

                    // is this a cache version?
                    console.log(q.metadata.fromCache);

                    set(snapToData(q));
                })
        });
};

export const addTodo = async (text: string) => {

    // set todos on client for optimistic updates
    const uid = auth.currentUser?.uid;

    if (!uid) {
        throw 'Must be logged in!';
    }

    setDoc(
        doc(collection(db, 'todos')),
        {
            uid,
            text,
            complete: false,
            createdAt: serverTimestamp()
        });
}

export const updateTodo = (id: string, complete: boolean) => {

    // update on client for optimistic updates
    updateDoc(
        doc(db, 'todos', id),
        { complete }
    );
}

export const deleteTodo = (id: string) => {

    // delete on client for optimistic updates
    deleteDoc(
        doc(db, 'todos', id)
    );
}
Notice the loadTodos function at the top. This will be used later to propagate the client cache with the server data in order to prevent double fetching the same data.
Firebase Admin #
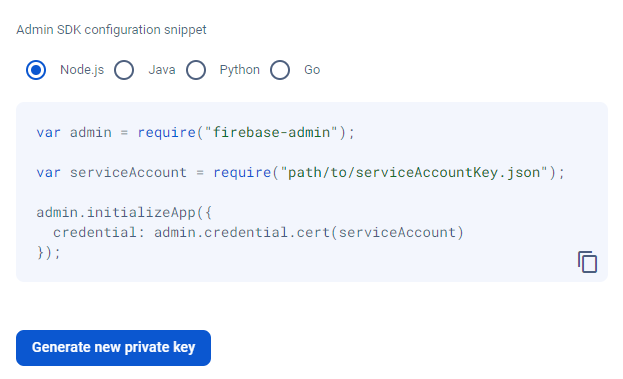
The Firebase Admin setup is similar to the client SDK, but uses a private key. Go to your Firebase Console, click Project Settings, then Service Accounts. Click Generate new private key.
Once you get the new key, put it inside your .env file as a string under your regular public firebase API key.
	PUBLIC_FIREBASE_CONFIG={"apiKey":"...","authDomain":"...",..."}
PRIVATE_FIREBASE_ADMIN_CONFIG={"type":"...","private_key_id":"..."}
You can then use it inside your firebase-admin.ts setup file.
	import { PRIVATE_FIREBASE_ADMIN_CONFIG } from '$env/static/private';
import { getApps, initializeApp, cert } from 'firebase-admin/app';
import { getAuth } from 'firebase-admin/auth';
import { getFirestore } from 'firebase-admin/firestore';

const firebase_admin_config = JSON.parse(PRIVATE_FIREBASE_ADMIN_CONFIG);

// initialize admin firebase only once
if (!getApps().length) {
    initializeApp({
        credential: cert(firebase_admin_config)
    });
}

export const adminAuth = getAuth();
export const adminDB = getFirestore();

export const COOKIE_NAME = '__session';
This will look similar to firebase.ts, but you have to use the cert method as well when you import from firebase-admin. You also need to set a cookie name. If you deploy to Firebase Cloud Functions, you have to use __session as the cookie name.
Session Cookies #
Firebase has a set guide for Managing Cookies. If have simplified these functions to allow them to be reusable in any TypeScript server environment or Framework.
Create Session #
First we have to create a session, and return an error if there is one. This is inspired by Supabase.
	export const createFirebaseSession = async (idToken: string) => {

    let decodedIdToken: DecodedIdToken;

    try {
        decodedIdToken = await adminAuth.verifyIdToken(idToken);
    } catch {
        const error = {
            status: 401,
            message: 'Unauthorized request!'
        };
        return { error }
    }

    // Set session expiration to 5 days
    const expiresIn = 60 * 60 * 24 * 5 * 1000;

    if (new Date().getTime() / 1000 - decodedIdToken.auth_time < 5 * 60) {

        const options = {
            maxAge: expiresIn,
            httpOnly: true,
            secure: true,
            path: '/'
        };

        const sessionCookie = await adminAuth
          .createSessionCookie(idToken, { expiresIn });

        return { sessionCookie, options };
    }

    const error = {
        status: 401,
        message: 'Recent sign in required!'
    };
    return { error }
};
Get Session #
We also need to get the session from a token and verify it. This is necessary before we fetch anything on the server.
	export const getFirebaseSession = async (sessionCookie: string) => {

    let decodedClaims: DecodedIdToken;
    try {
        decodedClaims = await adminAuth
          .verifySessionCookie(sessionCookie);
    } catch {
        const error = {
            status: 401,
            message: 'Unauthorized request!'
        };
        return { error }
    }

    return { decodedClaims };
}
Hook #
SvelteKit has a hooks.server.ts file that allows you to add reusuable functions anywhere on the server. Here we create getSession().
	import { COOKIE_NAME } from "$lib/firebase-admin";
import { getFirebaseSession } from "$lib/firebase-session";
import type { Handle } from "@sveltejs/kit";

export const handle: Handle = async ({ event, resolve }) => {

    // setup firebase session to be accessible everywhere
    event.locals.getSession = async () => {

        const sessionCookie = event.cookies.get(COOKIE_NAME);

        if (!sessionCookie) {
            return null;
        }

        const {
            error,
            decodedClaims
        } = await getFirebaseSession(sessionCookie);

        if (error) {
            console.error(error);
            return null;
        }

        return decodedClaims;
    };

    return resolve(event);
};
We can add the type in app.d.ts in SvelteKit as well underneath our User and Todo types.
	import type { DecodedIdToken } from "firebase-admin/auth";

declare global {

	type Optional<T> = T | undefined | null;

	type UserType = {
		displayName: Optional<string>;
		photoURL: Optional<string>;
		uid: string;
		email: Optional<string>;
	};

	type Todo = {
		id: string;
		text: string;
		complete: boolean;
		createdAt: Date;
	};

	namespace App {
		interface Locals {
			getSession(): Promise<DecodedIdToken | null>;
		}
	}
}
Form Actions #
We can also create form actions for logging in and logging out on the server. In SvelteKit I put them in api/auth/+page.server.ts.
	import { error, redirect, type Actions } from '@sveltejs/kit';
import { createFirebaseSession } from '$lib/firebase-session';
import { COOKIE_NAME } from '$lib/firebase-admin';

export const actions = {

    logout: async ({ cookies }) => {

        // delete cookie and redirect
        cookies.delete(COOKIE_NAME, { path: '/' });

        redirect(303, '/');
    },

    loginWithGoogle: async ({ cookies, request }) => {

        // get idToken and verify it
        const { idToken } = Object.fromEntries(
            await request.formData()
        );

        if (!idToken || typeof idToken !== 'string') {
            error(401, 'Unauthorized request!');
        }

        const {
            sessionCookie,
            options,
            error: firebase_error
        } = await createFirebaseSession(idToken);

        if (firebase_error) {
            error(
                firebase_error.status,
                firebase_error.message
            );
        }

        // set generated session cookie
        cookies.set(COOKIE_NAME, sessionCookie, options);

        // redirect
        redirect(303, '/');
    }

} satisfies Actions;
Logging out from the server perspective just means deleting the cookie. Logging in means verifying the session and saving it as a cookie.
Calling Form Actions #
We can call the form actions on the client immediately after we login and logout. This will sync our server cookies.
	export async function loginWithGoogle() {

    // login with google and get token
    const credential = await signInWithPopup(
        auth,
        new GoogleAuthProvider()
    );

    const idToken = await credential.user.getIdToken();

    await addSessionToServer(idToken);
}

export async function addSessionToServer(idToken: string) {

    // send token to server and create cookie
    const body = new FormData();
    body.append('idToken', idToken);

    const action = "/api/auth?/loginWithGoogle";

    const response = await fetch(action, {
        method: 'POST',
        body
    });

    const result: ActionResult = deserialize(
        await response.text()
    );

    switch (result.type) {
        case 'error':
            applyAction(result);
            console.error(result.error);
            logout();
            break;
        case 'redirect':
            console.log('adding session to server...');
            applyAction(result);
    }
}

export async function logout() {

    // sign out on client
    await signOut(auth);

    await removeSessionFromServer();
}

export async function removeSessionFromServer() {

    const action = '/api/auth?/logout';

    // signout on server
    const response = await fetch(action, {
        method: 'POST',
        body: new FormData()
    });

    const result: ActionResult = deserialize(
        await response.text()
    );

    switch (result.type) {
        case 'error':
            applyAction(result);
            console.error(result.error);
            break;
        case 'redirect':
            applyAction(result);
    }
}
Component Form Actions #
We can call the form action components by using the action key in our form component. We are not using enhance directly, but the result is the same. Here is the logout.svelte component.
	<script lang="ts">
	import { logout } from '$lib/user';
</script>

<form method="POST"
  action="/api/auth?/logout"
  on:submit|preventDefault={logout}>
	<button type="submit" class="...">
		Logout
	</button>
</form>
And the login.svelte component.
	<script lang="ts">
	import { loginWithGoogle } from '$lib/user';
</script>

<form method="POST"
  action="/api/auth?/loginWithGoogle"
  on:submit|preventDefault={loginWithGoogle}>
	<button type="submit" class="...">
		Signin with Google
	</button>
</form>
Fetching the Data #
Fetching the data is very simple as the Firebase NodeJS SDK is similar to previous versions of Firebase before version 9. Here we create a todos-server.ts for server fetching only.
	export const getTodos = async (uid: string) => {

    let todoSnapshot: QuerySnap;

    try {
        todoSnapshot = await adminDB
            .collection('todos')
            .where('uid', '==', uid)
            .orderBy('createdAt')
            .get();

    } catch (e) {
        const fb = e as FirebaseError;
        error(500, fb.message);
    }

    const bundleId = Date.now().toString();

    // create buffer as string to pass to client
    const todoBuffer = adminDB
        .bundle(bundleId)
        .add('todo-query', todoSnapshot)
        .build()
        .toString();

    const todos = snapToData(todoSnapshot);

    return { todos, todoBuffer };
}
Notice we are using the bundle() method to to save our snapshot data as well as the string data. We can use the bundle data later to propagate the cache with data. We return both assuming there is no error.
Note: You need both, as SvelteKit hydration will pass both objects from the server anyway for the hydration.
Server Load Function #
Before calling the fetch function on the server, you must first verify the session by calling getSession(). You can then determine whether or not to load the user data. This the root +page.server.ts, but could be put in any route.
import { genText } from '$lib/todos';
import { getTodos } from '$lib/todos-server';
import type { PageServerLoad } from './$types';

export const load = (async ({
    locals: { getSession }
}) => {

    const session = await getSession();

    // always generate random things on server
    const text = genText();

    if (!session) {
        return {
            text,
            user: null,
            todoBuffer: null
        }
    }

    const user: UserType = {
        displayName: session.name,
        email: session.email,
        photoURL: session.picture,
        uid: session.uid
    };

    // get todos from firebase admin
    const {
        todos,
        todoBuffer
    } = await getTodos(session.uid);

    return {
        text,
        user,
        todos,
        todoBuffer
    };

}) satisfies PageServerLoad;
Client Load Function #
In SvelteKit, after the +page.server.ts file is loaded, the +page.ts file is loaded. This loads on the server and browser. You can load the todos from the function we created earlier, but we only need to do it in a browser environment where the realtime listener is attached.
	import { browser } from '$app/environment';
import { loadTodos } from '$lib/todos';
import type { PageLoad } from './$types';

export const load = (async ({ data }) => {

    if (browser && data.todoBuffer) {

        // add admin query to client cache
        await loadTodos(data.todoBuffer);
    }

    return data;

}) satisfies PageLoad;
Svelte Components #
Our user and todos data will be available from the server immediately on the $page function. We can import this anywhere in our app. Our hooks don’t require any parameters except for the top most version. In this app, the top most version of the user is on the home component.
const user = useUser($page.data.user);
This ensures we start our user store with the default value being our server data. This is important since we won’t use the auth on the server directly.
Our todos will by propagated the same way in our todos.svelte component, except we need to have a user store in order to start the derived store. Again, see the original Svelte Todo App post.
	const user = useUser();

const todos = useTodos(user, $page.data.todos);
And that’s it! Yes, it is complicated to pass data from the server to the browser, hydrate your realtime listener, keep our subscribers connected the right way, and make sure our session cookies are created the right way, at the right time.
Most people won’t need this, and I don’t know that it is worth it to add this to your app. This is only important for authenticated information, and it doesn’t work on Edge Functions. However, you want to optimize your serverless app, this might be the way to go.
Repo: GitHub
Demo: Vercel Serverless
Note: You will notice the Todo App is by far the fastest version I have built, assuming there are no cold starts. 😅
J